Blue String Pudding
I was studying minimalism, studying it mind, there was very little minimalist action in my cluttered life, but it had caused me to look seriously at the issue of the overpopulated wardrobe. I seized upon a long sleeved, lose, white shirt in some sort of man made fibre that had not been worn for 12 months… that’s the rule isn’t it? If you haven’t worn an article for 12 months it has to go? But there was nothing wrong with it, just maybe that where I live in the summer natural fibres work better, but in winter you don’t want white… what about giving a new lease of life in colour? Could it be up-cycled?
 I had really enjoyed tie die fun back in the day, and it seems to have had a revival so I studied some YouTube DIY tie dye videos, and seeing the ‘loud’ sometimes garish results I started to back pedal.

What about dip die? Silky smooth tones nuzzling through the piece, reminiscent of watercolours and Japanese landscapes, that was more my line, subtle.. but maybe with a twist up its sleeve?
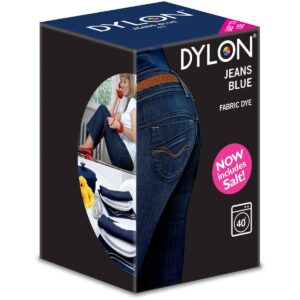
The day came when I had an hour of unbroken time to myself, I had studied the Dylon instructions in stolen moments and knew my first job was to weigh the garment to see how much die was required.
I wanted the top of my shirt to remain white and then four bands in graduated tones about a handspan wide. I marked these sections with a pin. Then I lightly pleated a narrow area just above the cuff of each sleeve, and bound it up with string using the traditional tie die method. I measured out the dye powder dividing it between four plastic cups. I carefully put these in a larger container and carried them through to the bathroom, this would be my production area. I placed a deep basin with hot water in the bath and I suspended a bungee cord from the towel rack overhead. I fixed the shirt by the neck section on a skirt hanger and hooked it on to the bungee. Then using the shower attachment I soaked my shirt in hot water. Next I poured one of the cups of dye into the basin and stirred it round. Now I lowered the shirt into the dye to about 2 inches below the top pin and tied off the bungee, now I could bounce the garment in the dye to get a smooth transition from white to 25% full blue. I had no idea how long this would take but after 5 minutes it was looking pretty good and I carried on for another 2 minutes for good measure.
IMG_2046
After I was happy with the tone of the first band of colour, I lifted the shirt clear of the basin and added a second plastic cup of dye, stirred it up and gently lowered the shirt to just below the second marker pin, shortening the bungee cord to hold it there while I bounced it in the deeper colour for another 7 minutes, and continued this process until I had four bands of colour in deeper and deeper shades.
IMG_2047
IMG_2048
IMG_2049
IMG_2050
The next morning had a hint of Christmas about it, after the shirt had stopped dripping, I had moved it outdoors to dry in the breeze overnight. When I woke up I was excited to unravel the sleeves and see how the tie dye had come out… What do you think?